
When people talk about Coinbase, most think of the centralized exchange registered in the United States. But that’s just the “COIN” part. Its other major business segment is the Base chain, Base DEX, and the “beginning to explore” BASE coin.
As someone who has used and recommended COIN in the past, I must now go against my former self. I no longer recommend using this centralized exchange, as it is not friendly to the Taiwan and Hong Kong regions, and even if you manage to get an account, it isn’t very feature rich. The Base chain, in contrast, is something I highly recommend. It has a strong brand, numerous applications, abundant resources, an active community, and even the potential for a future airdrop.
Imagine you’ve immigrated from Hong Kong to the UK. The first few things you’d probably do are open a bank account, transfer some of your funds from Hong Kong to your new UK account, and apply for some local identification. The world of blockchain is quite similar. In this issue, we’ll introduce the three essential first steps for new “immigrants” to Base: opening an account, funding your Base account, and applying for a Base “ID card.”
1. Opening a Base Account
1.1 For Muggles
For readers who do not yet have a self-custody wallet, please first refer to DHK Drifting Classroom to create a new wallet on your computer or phone.
1.2 For Mainstream Ethereum Users
If you already have an Ethereum wallet like MetaMask, Rabby, or Keplr, opening a Base account is simple—because you already have one, you just might not have seen it. Look for “Base” in the network selection menu. If it’s there, select it, and it will display your Base account and asset balance.
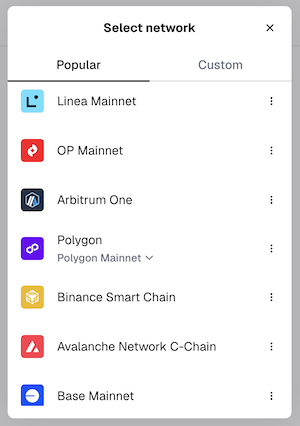
A Base account looks identical to an Ethereum mainnet account and other L2s like OP Mainnet and Arbitrum. This is convenient but can also cause confusions. Sometimes new users are shocked to see their account assets suddenly gone, not realizing that the interface is simply displaying a different network. For example, your assets might be on OP Mainnet, but the interface is currently showing Base. To address this issue, some wallets like Rabby have a more thoughtful design that displays all assets across various networks on the same interface.
1.3 For Other Ethereum Users
If you can’t find the Base option in your wallet software, you can visit Chainlist and click “Add to MetaMask” to add the network’s parameters to MetaMask.
Finally, if you are not using MetaMask, you can manually input the Base chain parameters provided on the page to make your wallet display the Base chain and its assets.
Don’t be intimidated by what seems like a lot of steps. In the decentralized world, users have the freedom to choose different software to accomplish the same task, so interfaces and details may vary slightly. Therefore, I’ve listed various scenarios to accommodate all users as much as possible. For mainstream users, your wallet likely already supports Base directly, and the only thing you need to do, as mentioned in 1.2, is to switch over to it.
2. Funding Your Base Chain Account
Once your account is set up, the next step is to fund it. In blockchain terminology, converting fiat currency into cryptocurrency is called “on-ramping.” If you already have cryptocurrency and want to move it to another chain, it’s called “bridging”.
Here are five methods; one of them is bound to suit you.
2.1 Superbridge
Superbridge supports the Ethereum mainnet, multiple L2s, and some EVM-compatible chains like Binance’s BNB Smart Chain and Hyperliquid’s HyperEVM. Users can easily transfer assets between these chains.
For example, if you have ETH on OP Mainnet, you can select OP > Base, then choose the asset and enter the amount:
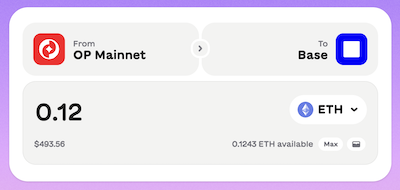
After making your selections, several route options will appear below. You can choose one based on factors like fees and time required.
The process is the same for bridging assets other than ETH, such as USDC. However, don’t forget that you must have a small amount of ETH on the Base chain for further operations. Otherwise, simply transferring USDC to the Base chain might leave it stuck, as you won’t be able to pay for transactions. Although some transaction types might have fee subsidies, these are exceptions, and it’s always best to hold a small amount of ETH.
2.2 Uniswap
From the name, you might think Uniswap can only be used to exchange one token for another. However, since Uniswap can “swap” a specific asset from one chain to another, it can also be used for bridging. For example:
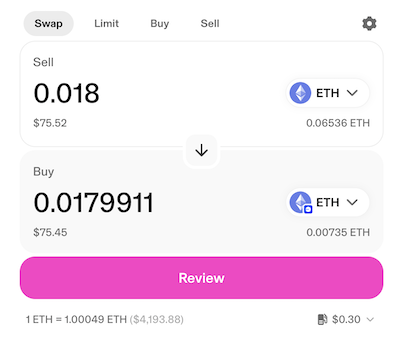
However, Uniswap does not yet support swapping a token and bridging it to another chain in a single operation. For instance, if you want to convert ETH to USDC and then bridge it to the Base chain, you would need to perform two separate transactions.
2.3 Centralized Exchanges
If you have assets stored on a centralized exchange that supports withdrawals to Base, such as Coinbase, Binance, or Kraken, you can also withdraw them directly to your Base account. This is generally a very fast process.
A bit of gossip: The fee for withdrawing from Binance to Base chain used to be very low, but it recently increased to 1 USD, while fees for other L2s remain very cheap. Logically, a regular ERC-20 transfer on the Base chain shouldn’t even cost 0.1 USD, let alone a full dollar. Could it be that the withdrawal fee to the Base chain is particularly high because someone is being a bit petty?
2.4 On-Ramping with a Credit Card
If none of the above methods work for you, you can download the Coinbase app from the App Store or Google Play, import or create a new wallet, and then buy crypto with a credit card.
This method is accessible to most people but requires KYC (Know Your Customer) verification and has relatively high fees.
2.5 The Last Resort: A Perk for “Daoyou Pro” Members
As a valued “Daoyau Pro” member, if you don’t want to bother with the steps above for now, you can simply fill out a form to provide your Base address. I will send you a small amount of ETH on the Base chain to get you started.
3. Basenames
Next up is applying for a Basename to get your “ID card” in the Base world.
With the preparations above, applying for a Basename is straightforward. Just go to the Basenames website, search for your desired name (though most are likely already taken), and register it.
After registering, you can set up your avatar, bio, and other information to gradually build your public identity in the Base world, like this:
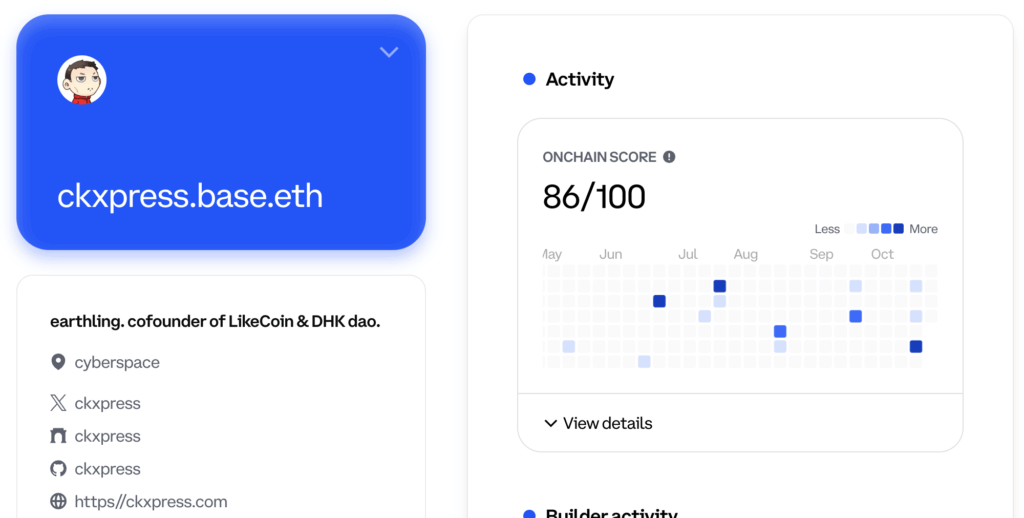
base.org/name/ckxpressA reminder to everyone: to date, the level of privacy on the blockchain is very low. Associating your wallet address with your name, avatar, and description is equivalent to telling the whole world who is behind the transactions of that address. This is only suitable for public identities or social accounts involving small amounts of assets.
I’ll be back next week to introduce some dApps on Base. Until then, feel free to explore the Base ecosystem through the links on the Basenames page. If you find anything interesting, leave a comment and share it with everyone.
p.s. This is the first article in human history that I’ve published while wearing glasses 🤓.
Leave a Reply